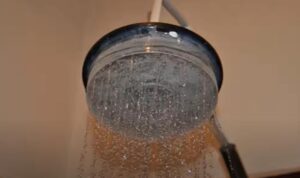
If you require a stylish yet spa-like shower experience without spending a fortune, then rain shower heads give you the best solution. Rainshower heads usually are more prominent than traditional showerheads. Moreover, they have more nozzles enabling them to provide you with rain like sensation while showering, making them quite popular.

Recommend reading: The Best Delta Gold Shower Head Reviews
Detailed Steps on the Diy Rain Shower Head
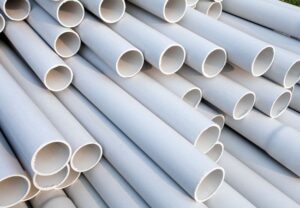
Upping your showering experience by making your rain shower head is not as complicated or expensive as you might think. Standard equipment such as CD boxes and PVC pipes can be easily used in their making, as you will shortly see.
Recommend reading: Top 10 Best Shower Head and Hand Shower Combo Reviews
Requirements
Before you embark on your DIY rain shower head making collect the following equipment:
- CDs box or PVC pipes
- Needle
- Scalpel
- A hot glue gun
- Candles
- Ruler
- A pair of dividers
- Thin, small piece of pipe
Recommend reading: Top 5 Best Delta Magnetic Shower Head Reviews with Handheld Shower Head Combo
Process
1. Using your pair of dividers, draw a grid of circles as per your convenience on your CD box’s transparent section.
2. Use your pair of dividers and a ruler to draw straight lines again as per your convenience to intersect the lines forming a grid pattern.
However, in the above two steps, ensure you do not engrave the circles and lines too profoundly as they are primarily to help guide you in making well spread out nozzles.
3. Light your candle, then holding the needle using a pair of forceps or well-insulated gloves, heat the candle till it is sufficiently hot.
4. Once hot, quickly pierce the intersections on the transparent CDs box section using the needle to make a hole.
5. Repeat step 4 till all the intersections of the circles and lines get wholly pierced.

Having concluded the above steps, now you are to make the rain shower head base.
6. Cut the protruding section at the bottom of the CD box using a scalpel leaving a hole behind.
7. Take your small, thin pipe, and fit it into the hole. Take care not to stuff a large piece of pipe in as it will trouble you later on, as you will see.
8. Using your hot glue gun, glue the pipe in place water tightly.
9. Glue the CDs box back together using your hot gun glue, making sure it is watertight. If you used a large piece of pipe in step 7, you would have to cut the line before proceeding to this step.
With the above steps followed, you need only install the showerhead and experience the rain like sensation.
Here is a video about DIY rain shower head:
Recommend reading: The 20+ Best Delta Shower Faucets Reviews
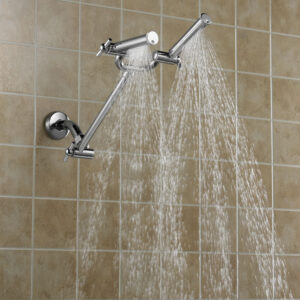
How to Convert Single Shower Head to Dual?
Dual shower heads enable you to shower comfortably with your partner without having to trade turns under the shower.
However, if you are considering converting your single shower to a dual shower, you need to consider the following:
Dual shower heads with one valve
In this scenario, you and your partner will have to agree on which temperature setting to use as the water is controlled similarly for both showerheads. Moreover, water pressure will probably decrease by half, so each shower gets nearly the same amount of water.
Recommend reading: The 10+ Best Handheld Shower Head for Elderly Reviews
Dual shower heads with two valves
Unlike in the previous scenario, here, each individual can set the water temperature to their preference. However, this option will require you to have a fair amount of plumbing skills or hire a professional making it particularly unattractive.
Recommend reading: Delta Shower Faucet Installation
Consideration of water pressure
Once you decide to go for dual shower heads, water pressure is bound to fall. Therefore, before committing to a dual shower head, always consider the following factors:
1. The thickness of the pipes
Pipes thickness is directly proportional to the amount of water flowing through it per unit of time. As such, always know if the pipe diameter will adequately serve your dual shower head.
Recommend reading: The 9 Best Delta H2okinetic Showerhead Reviews
2. Water source
If you get your water from a well, you will have issues generating sufficient pressure to serve the dual shower head. As such, you will need to buy a more powerful pump or have a water storage tank to even out the pressure.

Recommend reading: The 9 Best Delta H2okinetic Showerhead Reviews
Conversion process
1. Cut off the water supply to the shower using the valve located in the bathroom or basement or whichever location it is in your house.
2. Using pliers or a wrench, gently turn the showerhead anti-clockwise till you remove it. If there is rust or mineral build-up, use vinegar to loosen, then re-try.
3. With the showerhead removed, remove the plumber’s tape and clean as necessary.
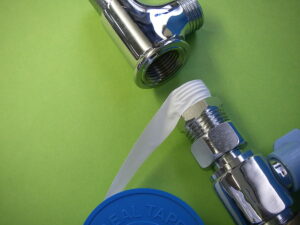
With the pipe surface clean, the next steps detail the installation of the dual head.
4. Reapply a fresh coat of plumber’s tape on the pipe threads to make them watertight.
5. Take the tiny rectangular piece known as the base valve and install it. It will connect to both the removable head and the main head. Moreover, the switching valve is in it.
6. Apply plumber’s tape on the valve’s threads and install the main showerhead. Fasten the main showerhead using a wrench or pliers.
7. Ensure you coat each connecting thread you encounter using the plumber’s tape, screw in the extending rope pipe then secure the shower head on it.
8, Turn the water supply back on and test for leaks. If leakage occurs, tighten the connectors and if it persists, redo the connection, ensuring you apply more plumber’s tape to make it watertight.
Recommend reading: Top 5 Best Delta 5 Spray Shower Head Reviews
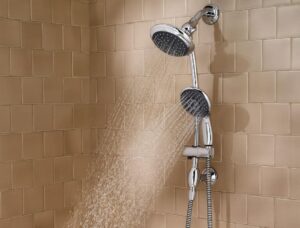
How to Add a Hand Held Shower Head to Existing Shower?
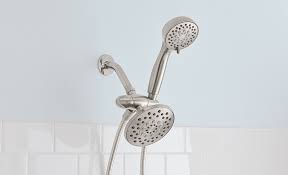
At times having the traditional overhead shower just doesn’t cut it, and you fancy an overhead shower and hand-held shower combination. In such a scenario, follow the below steps to attain your desired result:
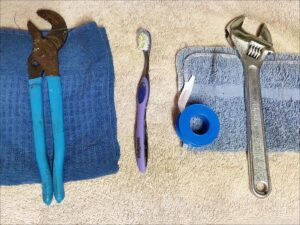
1. Tools
Before you start the process, collect the following equipment:
- Adjustable wrench
- Plumber’s tape
- Adjustable pliers
- Hand-held shower head
2. Using either your adjustable pliers or wrench, rotate the showerhead anti-clockwise to detach the showerhead. If rust or mineral build-up is preventing smooth detachment, use vinegar to loosen it.
3. Remove the plumber’s tape leftover on the threading and adequately clean the pipe.
4. Reapply a fresh layer of plumber’s tape to the threading to make it waterproof.
5. Tighten the bracket onto the shower arm using your hands, then transition to using a wrench or pliers to fasten it properly. You can use a small towel to avoid scratching.
6. Insert the washer into one of the hose’s ends and fasten it onto the bracket’s bottom outlet.
7. Insert the other washer into the hose’s remaining end, then fasten it onto the hand-held shower head.
8, Position the hand-held showerhead in its position on the bracket.
9. Reattach the shower head you had earlier detached back to its position.
10. Test for leaks and adjust appropriately by either tightening or applying more plumbers’ tape.
Recommend reading: Top 6 Best Delta Rain Shower Head Reviews
Conclusion
Whether it is a DIY rain shower head, converting a single shower head to a dual, or even adding a hand-held showerhead to an existing shower, following the appropriate procedures above will ensure you attain your desired features. However, in case of any complications, do not hesitate to consult a professional.
Recommend reading: Best High End Shower Head Reviews