Shower valves play a vital role in regulating the outflow of water from the showers. It hence goes that you have to pay keen attention when attempting to make use of them. We prepare this article to help you in leveraging these valves for our own showers and applications.

Recommend reading: Best Overhead Shower Head Reviews
What is the Standard Height for Shower Valve?
In a nutshell, there is really no predefined standard height for a shower valve. Instead, there are mainly different kinds of height designation. The precise height of the showerhead varies markedly within these heights. The segment below endeavors to shed more light about them for you to note:
Recommend reading: Top 17 Best Delta Shower Heads Reviews
– Standards Shower Height
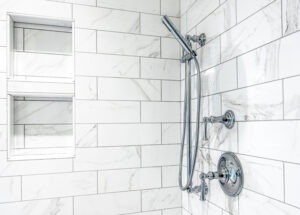
Under normal circumstances, you should install the shower valve around 38 to 45 inches above the ground. In case your shower doubles as a bathtub, you should fix it around 8 to 18 inches above the bathtub in order to accommodate those bathers who are seated on the tub.
Just in case yours is installed in an area that experiences heavy traffic, it should take into consideration the highest possible user. This, in most cases, stands at about 80 inches from the floor. The idea here is to prevent the possibility of constraining some users when they get to shower.
Recommend reading: Best Overhead Shower Head Reviews
– Popular Showerheads and Heights
The heights of shower valves and spouts do vary considerably by brand. That means there is yet again no standard height for these accessories and items. You have to take the necessary consideration when attempting to find a height that is convenient for your course.
In most cases, the heights to be used ought to be adjustable to accommodate the needs of the many kinds of users who may be in need of it. That also demands some expertise on your side to be able to handle and accommodate. The exact same area where you install it also counts.
Recommend reading: Best Eco Shower Head Reviews
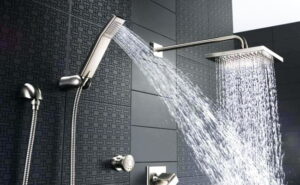
– Handheld Showerheads
Handheld showerheads are great for households and settings that have many cadres of users. This stems from their ability to meet the needs of many people regardless of their unique heights. In such a case, the recommended height ought to be around 72 to 78 inches above the floor.

Recommend reading: Best Waterfall Shower Head Reviews
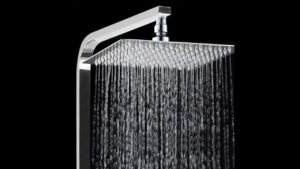
– Rain Showerheads
The rain shower heads are designed to deliver the water from a fixed position above the floor. For them to discharge their waters uninterruptedly, they have to be fixed as far above the floor as can be. This, in most cases, should be around 84 inches above the floor surface.
Recommend reading: Top 8 Best Luxury Shower Head Reviews
– Shower Accessory Height
It is not uncommon for the showers themselves to attach and pair with many other accessories. Needless to say, you have to take care of these accessories as well while determining the necessary height of the showerhead. That is because their heights must also be taken care of.
As a general rule, you must also take care of the height of each respective valve or accessory prior to the installation thereof. That is to prevent any mismatch between these metrics while at the same time enabling the users to have some room to operate smoothly and freely.
All factors considered, you should place the valve at a height between 36 and 48 inches. This is assuming no other controls or accessory that is fixed to the valve or the showerhead. Again, you must consider the heights of the users and the room they need to move about freely.
Recommend reading: Best Speakman Shower Head Reviews
What to Consider Before Deciding the Shower Valve Height?
When determining the precise height of the shower height to pick and use for the job, you have to take care of these factors:

-
The Nature of the Users
The nature of the users who intend to leverage the shower valve should come first. If those persons are taller, the height of the valve should similarly be taller. Of course, the valves should be shorter if the said users are to be shorter. Have the long-term in mind as you ascertain these.
Recommend reading: Best Selling Shower Head Reviews
-
Prevailing Local Building Codes
Each area and jurisdiction has in place some unique building codes that govern the installation of the valves and other building apparatus. You must of necessity pay some keen attention to these codes and adhere to them in your attempt to find the right valve.
Recommend reading: Best Shower Head Under $50 Reviews
-
Desired Water Pressure Levels
What is the pressure level of the water you are looking up to? Different kinds of heights deliver different levels of pressure. If you want a higher pressure, you must choose a higher valve as it is more likely to deliver the same. On the flip side, a lower height delivers similarly low pressure.
Recommend reading: Top 10 Best Shower Sets Reviews
-
Unique Configurations and Types
Different manufacturers are engaged in the production of these items. They hence come about in diverse shades and kinds. You have to be alive to these facts too in your search for the right valve height. Choose that which is taller and comprehensive for taller users and vice versa.
Recommend reading: Best Watersense Shower Head Reviews
-
Controls and Engagements
These items differ markedly insofar as their controls and engagement regimes are concerned. As you make a search for the right valve height, you have to be mindful of these as well. Choose one that is easier and convenient to engage if you lack the necessary expertise, and the opposite is, of course true.
Recommend reading: Best High End Shower Head Reviews
-
Extras and Accessories
Like any other piece of plumbing materials, these items also accept many other extras and accessories. Examples of these are diverters, hand showers, anti-scald valves, and pressure-balancing valves, to name but a few! Choose a higher height if you want to incorporate many attachments.
Recommend reading: Best High Flow Shower Head Reviews
-
Financial Muscle Power
Your financial muscle power also comes in. You want to settle on a valve height that is affordable to you. For that to happen, you have to take the time to compare and contrast the many offerings that dealers have in place. Then, choose the cheapest from the block.
Recommend reading: Best High Flow Shower Head Reviews
-
Airflow and Circulation Needs
Extremely tall and bulky shower valve heights also come with the disadvantage of being able to impede the smooth flow of air in and around the rooms. You want to steer clear of this. That is why you have to mark out your room sizes and choose a valve that fits smoothly and neatly therein.
Recommend reading: Best Bathroom Shower Heads Reviews
-
Desired Spray Patterns
Apart from merely dispensing the water outputs, the shower heads may also generate and exude certain patterns. You have to first and foremost know which pattern you are looking up to before determining the height that may most likely suit it. Then, settle on a valve with that height.
Recommend reading: Top 10 Best Combination Shower Heads Reviews
How to Install the Shower Valves?
We now take you through the process of installing the shower valves. This is a delicate undertaking that has to be treated with the utmost degree of carefulness. You will first and foremost garner the necessary tools and materials after which you are to follow the laid-down steps.
– Tools and Materials Required
Start it out by garnering the following tools and materials:
- Copper tubing cutter
- Emery cloth
- Fire extinguisher

- Flux
- Hacksaw
- Inspection mirror
- Lead-free solder
- New shower valve
- Propane torch
- Protective gloves
- Rags
- Spray bottle
Recommend reading: Best Shower Heads With Wand Reviews
– Step-by-step Procedures
Now follow the procedures below to bring this exercise to fruition:
Step I: Eliminate the pre-existing valve (optional)
Start out by eliminating the pre-existing valve. This step is optional if your showerhead has no valve at the moment. Use the screwdrivers to unwind the valve from the head wherein it is installed. Be slow and careful to prevent inflicting permanent damage to the other structures on the door.
Step II: Dismantle the new valve
Now dismantle the new valve slowly and steadily. Do this by removing the plastic cartridge and the housing from the body of the valve. As you do this, keep accurate track of how the parts dismantle. That will aid with the re-installation later on. Consider taking a cellphone video of the same.
Step III: Prep the valve for the installation exercise
You are now almost good to go. Before you go, you should now prep the valve for the purpose of the proceeding installation exercise. Contemplate capping the bottom of the outlet of the valve by soldering it with a copper cap. That is to reinforce the same and make it longer lasting.
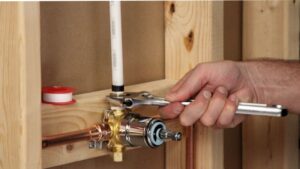
Step IV: Position the valve strategically
This forms the core of the installation exercise. At this stage, you should maneuver the valve perfectly in place inside the wall. Take great care that you drop not the valve as you do this. Use the video you captured earlier to guide you through the steps of tackling this end.
Step V: Solder the fittings
After slotting the valve firmly in place, you should now proceed with haste to solder the fittings. Use the propane torch to tackle this task. As you do this, exercise extreme caution. Of necessity, you should arm yourself with a fire extinguisher or a bottle of water. You might need them to put out the fires.
To be on the safe side, you should in fact wet the wall. That is to minimize the outbreaks of the fires or the spread thereof in case the same breaks out inevitably. Make several runs or passes to the affected area to come up with the toughest ends on the whole.
Step VI: Fix in place the valve cartridge
The time has now come to fix in place the valve cartridge. Before you do this, give the pipes and the shower valve some time to cool off. Use the exact same procedure you did when dismantling the same to fix it in place. Refer extensively to the video you took in your quest to do this one.
Step VII: Slot back the handle and the trim
Slot back the handle and the trim to the installation. To do this, fix the cover plate firmly in place then finish off by screwing the cartridge sleeve back on. Finish it off by squeezing the handle back in its place. While undertaking all these, you have to rely extensively on the video you took previously.
Step VIII: Lay the final touches
Having done all of the above, you are now almost good to go. Before you go, however, you now need to lay some final touches. Here, you should just test the system to try and find out whether or not it may serve the purpose intended or not. Fix any issues before ‘calling it a day.’
Recommend reading: Best Shower Heads With Wand Reviews
Conclusion
It is not wise at all to read all the explanations above and do nothing in response thereof. We urge you now to consider purchasing the shower valve of your choice and liking. Use the explanations above as the yardsticks to find and settle on a unique one for yourself.
Recommend reading: Best Rain Shower Head Combo